
Notice
Recent Posts
Recent Comments
Link
250x250
| 일 | 월 | 화 | 수 | 목 | 금 | 토 |
|---|---|---|---|---|---|---|
| 1 | 2 | 3 | 4 | 5 | 6 | 7 |
| 8 | 9 | 10 | 11 | 12 | 13 | 14 |
| 15 | 16 | 17 | 18 | 19 | 20 | 21 |
| 22 | 23 | 24 | 25 | 26 | 27 | 28 |
| 29 | 30 |
Tags
- REACT
- typeScript
- 내배캠 프로젝트
- 파이썬 반복문
- useState
- 리액트
- 리액트 훅
- JavaScript
- 리액트 프로젝트
- 내일배움캠프
- 리액트 공식문서
- 리액트 공식 문서
- 파이썬 for
- 내일배움캠프 최종 프로젝트
- 코딩테스트
- 자바스크립트
- React Hooks
- 내일배움캠프 프로젝트
- 파이썬 replace
- 파이썬 딕셔너리
- useEffect
- 타입스크립트 리액트
- tanstack query
- 한글 공부 사이트
- Next 팀 프로젝트
- 프로그래머스
- 파이썬 slice
- 파이썬 enumerate
- 타입스크립트
- 파이썬 for in
Archives
- Today
- Total
sohyeon kim
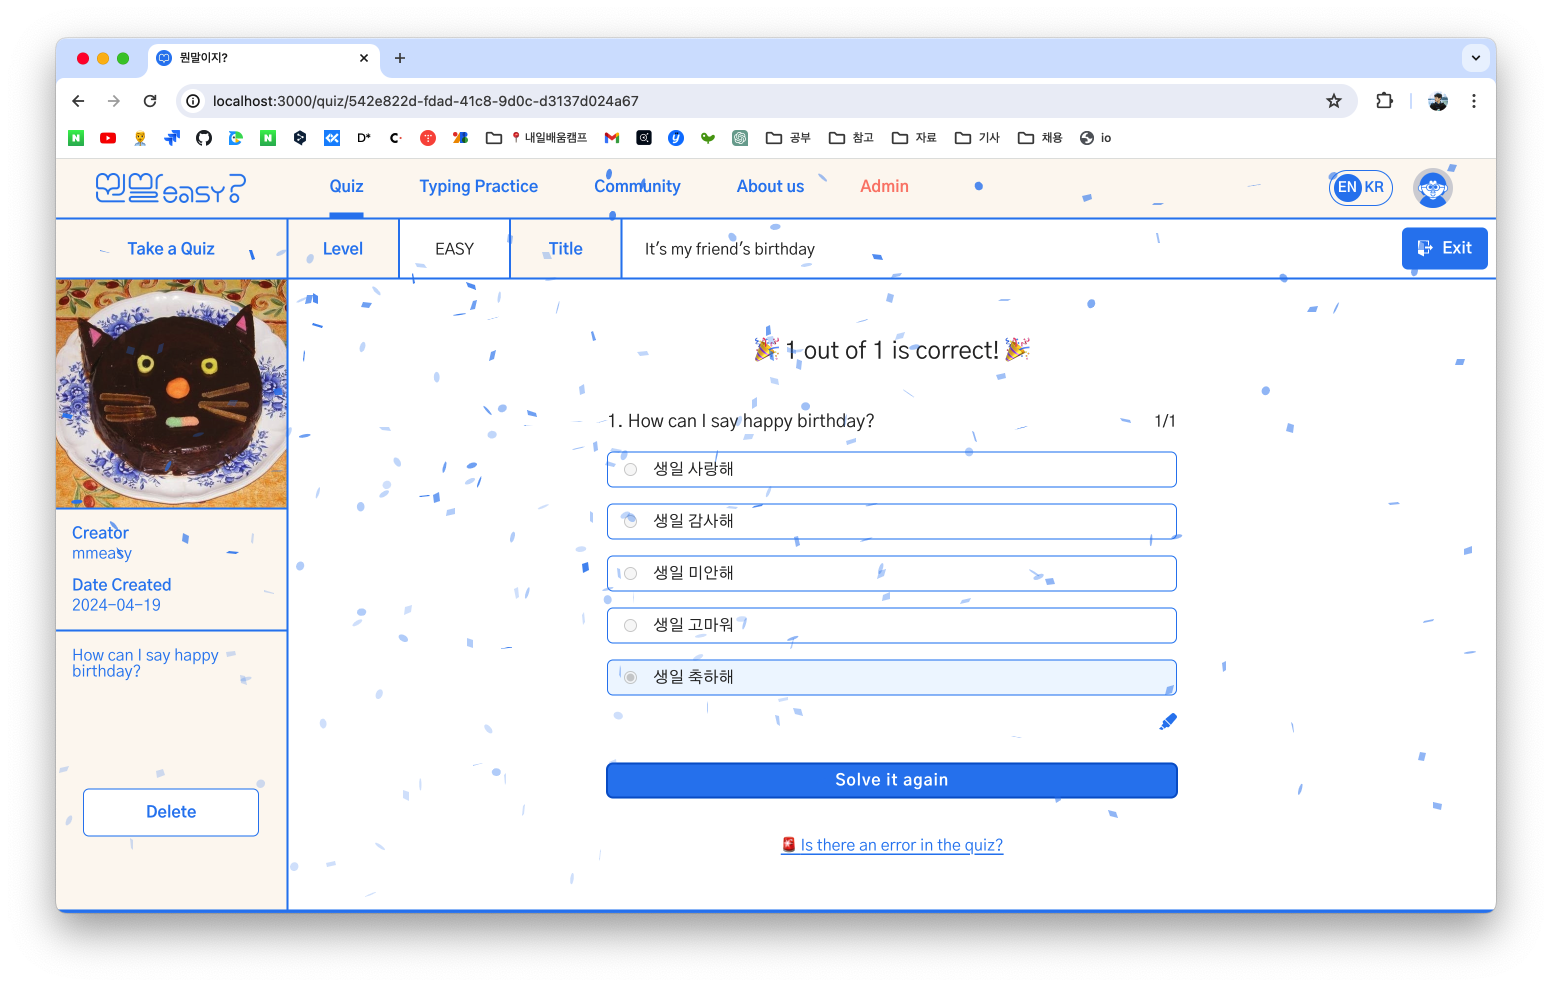
[React/Next] 리액트 confetti 폭죽 효과 : react-canvas-confetti 🎉 본문
728x90
반응형
💡 리액트 폭죽 효과를 넣어보자!
yarn add react-canvas-confetti or npm install react-canvas-confetti
🎉 전체 코드
page.tsx - confetti 실행 버튼을 넣은 위치
import confetti, { Options as ConfettiOptions } from 'canvas-confetti';
import tailwindColors from '../../../../tailwind.config';

 const handleConfetti = () => {
    const duration = 3000;
    const animationEnd = Date.now() + duration; // 지금 시간부터 5초동안 폭죽 효과
    // tailwind.config 에 지정해둔 컬러 변수 불러옴
    const { colors } = tailwindColors.theme?.extend as { colors: TailwindColors };

    const setting: ConfettiOptions = {
      // 폭죽 효과 CSS 설정
      particleCount: 100,
      spread: 100,
      origin: { y: 1.5 },
      colors: [colors?.pointColor1, colors?.pointColor2]
    };

    function randomInRange(min: number, max: number) {
      return Math.random() * (max - min) + min; // 최소값, 최대값 사이 무작위 숫자 생성
    }

    const interval: NodeJS.Timeout = setInterval(() => {
      // 일정 시간마다 폭죽 터트림
      const timeLeft = animationEnd - Date.now();

      if (timeLeft <= 0) {
        // 시간 다 끝나면 폭죽 끔
        return clearInterval(interval);
      }

      const particleCount = 50 * (timeLeft / duration); // 파티클 개수, 시간에 따라 조절됨
      confetti({
        // 위에서 설정한 세팅값을 복사하고, 파티클 수와 발사 위치 정함
        ...setting,
        particleCount,
        origin: { x: randomInRange(0.1, 0.9), y: Math.random() - 0.2 }
      });
    }, 250); // 0.25 초마다 confetti 생성
  };
tailwind.ts
import { CustomThemeConfig } from 'tailwindcss/types/config';

export type TailwindColors = Partial<CustomThemeConfig['theme']['extend']['colors']> | undefined;
🎉 Confetti Options
interface ConfettiOptions {
  angle?: number;
  spread?: number;
  startVelocity?: number;
  elementCount?: number;
  decay?: number;
  ticks?: number;
  origin?: { x: number; y: number };
  colors?: string[];
  shapes?: ('square' | 'circle')[];
  scalar?: number;
  zIndex?: number;
  disableForReducedMotion?: boolean;
  particleCount?: number;
}- angle: 파티클이 튀어나가는 각도, 기본값 90
- spread: 파티클이 퍼지는 범위, 기본값 45
- startVelocity: 파티클의 초기 속도, 기본값 45
- elementCount: 한 번에 생성되는 파티클의 개수,기본값 50
- decay: 파티클의 감쇠 비율,기본값 0.9
- ticks: 애니메이션의 지속 시간(프레임 수)
- origin: 파티클이 생성되는 위치, { x: number, y: number } 형식, y: 0.5 ➡️ 화면 세로 중앙
- colors: 파티클의 색상 배열
- shapes: 파티클의 모양 배열, 'square' 또는 'circle' 중 하나일 수 있음
- scalar: 파티클의 크기를 조절하는 스칼라
- zIndex: 파티클의 z-index 값
- disableForReducedMotion: 사용자가 prefers-reduced-motion 미디어 쿼리를 설정했을 때 confetti를 비활성화할지 여부를 결정
- particleCount: 한 번에 생성되는 파티클의 개수, (0.4.0 이상의 버전에서 추가됨)
🎉 Color 지정
const confettiOptions = {
  colors: ['#ff0000', '#0000ff'] // 빨간색과 파란색
  // 컬러를 하나만 지정해놔도 조각들마다 투명도가 알아서 지정이 되는듯하다!
};
원래는 이런 식으로 색상 코드가 적혀있었는데 tailwind 에 지정해둔 변수를 쓰고싶었다.
찾아보니 tailwind.config 를 import 해와서 적용하는 방법이 있었다.
전에 svg 파일에 fill 색상 적용할 때 변수를 넣는 방법을 못찾아서 그냥 색상 코드로 적어놨었는데
confetti 만들면서 같이 해결하게 됐다. 아주 행복..🥹


🔗 https://www.kirilv.com/canvas-confetti/#realistic
canvas confetti
You can combine multiple calls to confetti with any settings in order to create a more complex effect. Go ahead, combine different shapes, sizes, etc. Stagger them for an extra boost of excitement. ✨ Celebrate with a burst of stars! ✨
www.kirilv.com
728x90
반응형
'Next' 카테고리의 다른 글
| [Next] Next.js 공식문서 정리 2 : 데이터 가져오기 Data Fetching, 캐싱, 서버 액션, 뮤테이션, 클로저, 컨벤션, 알아두면 좋은 점 (0) | 2025.02.07 |
|---|---|
| [Next] Next.js 공식문서 정리 1 : 라우팅 Routing 개념, 컨벤션, 알아두면 좋은 점 (0) | 2025.01.10 |
| [React/Next] 폰트 최적화 : getaddrinfo enotfound fonts.gstatic.com, 웹폰트 깨짐 🥵 (1) | 2024.04.25 |
| [Next] Image hostname Error (1) | 2024.03.15 |
| [Next] React Query (1) | 2024.03.15 |
'Next' Related Articles
more


